
Description
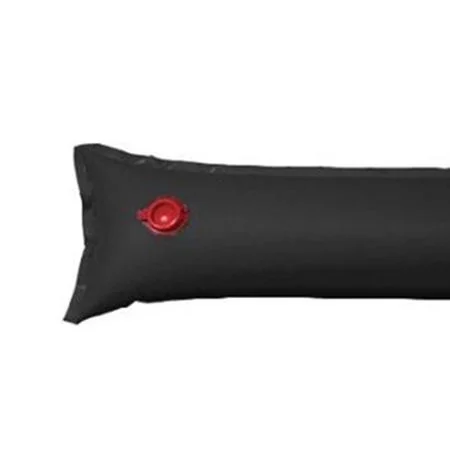
GLI 10′ Heavy Duty Single Black Water Tube
Water Tubes will keep the cover from sinking into the inground swimming pool. Tubes should ideally be touching each other end to end (around the pool). They will not split, rip, puncture or break. Installation is easy! Simply fill to 50% capacity (to allow for expansion of ice) with a garden hose and close the leak-proof valve.
Water tubes are an essential component for effectively winterizing your swimming pool, providing a reliable solution for securing winter covers. Designed to be filled with water, these tubes act as weights to hold down the edges and corners of your pool cover, ensuring it remains securely in place throughout the winter months. By preventing the cover from shifting or blowing away in strong winds, water tubes help protect your pool from debris, dirt, and harsh weather conditions, ultimately preserving the cleanliness and integrity of your pool.
The importance of using water tubes cannot be understated, as they play a vital role in maintaining the condition of your pool during the off-season. By keeping the cover taut and in place, water tubes help prevent leaves, twigs, and other debris from entering the pool, reducing the need for extensive cleaning when it’s time to reopen. Additionally, they help prevent water from pooling on top of the cover, which can lead to sagging and potential damage. By investing in water tubes, pool owners can enjoy peace of mind knowing that their pool is well-protected and ready for use when warmer weather returns.
When using water tubes, it’s important to fill them only 1/2 to 3/4 full, as water expands when it freezes and can rupture the tubes if overfilled. For added protection against freeze damage, consider adding a small amount of non-toxic pool antifreeze. When installing, place the tubes around the perimeter of the pool cover, approximately 18 inches apart. In windy areas, positioning the tubes end to end can provide additional stability. Always use water tubes or winter cover blocks instead of sharp or abrasive items like bricks or cinder blocks, which can cause rips and tears in the cover. For convenience, water tubes can be filled using a standard garden hose, and it’s recommended to ensure the filler caps are facing upwards during installation. By following these tips, you can maximize the effectiveness of your water tubes and keep your pool in excellent condition all winter long.
Tips for Choosing and Installing Water Bags
- With Loops:If your pool cover has water bag loops around the edge, usesingle-channel bags.
- Without Loops:If there are no loops, opt fordouble-channel bagsorwinter cover blocksto keep them in place.
- Spacing:Place the water bags around the edge of the pool cover, keeping them18 inches apart.
- Windy Areas:In very windy locations, you might want to place the bagsend to endfor extra stability.
- Fill Level:Only fill the water bagshalfway to three-quarters full. This allows room for the water to expand when it freezes.
- Antifreeze:You can add a small amount ofnon-toxic pool antifreezeto help prevent freeze damage.
- Do Not Use Sharp Items:Never use sharp or rough objects like bricks or cinder blocks to weigh down your pool cover. These can cause rips and tears. Always use water bags or winter cover blocks instead.
- Animal Protection:If small animals or birds are poking holes in your water bags, consider using sturdierwinter cover blocks. Rolling the bags into the edge of the cover can also provide extra protection.
- Filling Bags:You can fill the water bags with a standard garden hose before placing them.
- Cap Position:When installing the bags, make sure thefiller caps are facing upwards.
By following these tips, you can effectively secure your pool cover and protect it from the elements!
Reviews
There are no reviews yet.